Eggs Benedict with Homemade Hollandaise

IMG_2474.JPG

This is a traditional Easter morning breakfast at our house, BUT after a failed attempt at homemade Hollandaise sauce as a newly wed I put the idea on a shelf.

Until recently

I got my cooking courage back up and I found this easy EASY, EASY process for making it!

Try it! It’s incredibly simple!

And sooooo rich, creamy, decadent and delicious!

Ingredients:

  • 1 pound NWN Canadian Bacon

  • 2 dozen NWN Pastured Eggs

  • 1-6 pack Organic English Muffins (Dave’s Killer Bread is my favorite)

  • 1 cup or 2 sticks Butter (my favorite is Kerrygold)

  • 1 whole lemon, juiced

  • Cayenne Pepper or Paprika to garnish

  • Chopped chives or green onions to garnish

Instructions:

  1. Poach your eggs. Bring a pot of water to a boil, add a splash of apple cider vinegar. This helps the egg whites stick together. With a spoon begin stirring the water in a large circular motion, like you’re creating a tornado. When the tornado is really swirling crack an egg, or two or three into the water. The tornado helps wrap the egg around itself and keep the whites together too. Cook for 2 1/2 to 3 minutes. Remove with a slotted spoon to a plate, cover with an upside down plate to keep warm. Just before serving you’re going to add the eggs back into hot water to finish cooking so they are hot when you’re ready to eat. Nobody likes cold eggs! Repeat process until you have enough poached eggs to feed your crew. I found that three eggs was the max I could crack into my swirling water before it lost momentum.

  2. Broil English Muffins and Canadian Bacon. This sounds like a cultural gathering of all breakfast foods! We are going to leave out the French Fries though :) Lightly butter your English muffin halves and add an equal number of slices of Canadian Bacon to a tray and place under a low broil setting in the oven. Broil just until warm and slightly golden. You may want to flip the Canadian Bacon half way through. Turn oven off but leave muffins and bacon in to keep warm.

  3. Make Hollandaise Sauce. In a small saucepan, melt 2 sticks of butter until sizzling but don’t let it brown. Separate 3 eggs and place the yolks into a blender (or a pitcher so you can use your submersible blender). Pulse the blender of low just until combined. With the blender running continuously, pour the hot butter very slowly into the eggs, then immediately begin pouring in the lemon juice. Add a dash of cayenne pepper if you like a little spice. Simple right!!!???

  4. Plunge your poached eggs back into hot water for a minute to finish cooking them. If you like a runny yolk, just lift the egg out of the water with a slotted spoon and press on it to see if it’s squishy. You’re looking for a consistency the same as pushing on the fleshy part of the palm of your hand, at the base of your thumb. If you prefer your yolks cooked all the way through use the push test again and this time you’re looking for a firmness similar to the feeling if you were to push on the top of your hand.

  5. Assembly Time. Place a half of an English Muffin, then your slice of Canadian Bacon, then your poached egg. Top with your Hollandaise Sauce and garnish with fresh chopped chives (I just grabbed these from the garden) or Paprika.

  6. Serve with a side of asparagus (seasonably on time as a spring veggie) or a fruit salad.

  7. Enjoy! You did it! Not so intimidating after all right???

Nourished With Nature Canadian Bacon

Nourished With Nature Canadian Bacon

Broil the buttered English Muffins and Canadian Bacon

Broil the buttered English Muffins and Canadian Bacon

Make the Hollandaise Sauce using a submersible blender.

Make the Hollandaise Sauce using a submersible blender.

Use fresh chives or green onions for garnish.

Use fresh chives or green onions for garnish.

Top with paprika, cayenne or chives for a pretty picture!

Top with paprika, cayenne or chives for a pretty picture!

Remember to visit our Farm Store to pick up all your fixings for your Easter Feast!

Maple Orange Honey Mustard Ham

ham pioneer woman.jpg

I am always searching for that perfect ham recipe that will make my Holiday dinner special. Easter, Christmas or Thanksgiving. We love ham!

I want it to be sweet, flavorful and not too dry, but I do not want to resort to using Dr. Pepper or Ginger Ale, lets keep the ingredients REAL here friends.

After scouring the internet for the perfect recipe, I’ve decided to take the best of several recipes and combine them into my own creation!

We have beautiful bone-in smoked and cured Hams in perfectly sized 3-6 lb packages. You could combine a couple if you are feeding a bigger crowd. These hams are from our very own pigs raised in our oak forest and finished on acorns.

So come by our farm store this week or catch us at the Corvallis Farmers Market on Saturday and pickup what you need for your Easter Feast!

Here we go!

Ingredients:

  • 3-6 lb Nourished With Nature Ham

  • 1 cup honey

  • 1/2 cup Pure Organic Maple Syrup

  • 1/2 cup fresh squeezed orange juice or 3 Tbsp OJ concentrate

  • 5 Tbsp Dijon Mustard

  • 3 Tbsp Organic Apple Cider Vineger

  • 1/2 tsp salt

  • 1/4 tsp pepper

  • 15-20 whole cloves

Instructions:

  1. Preheat your oven to 325 degrees.

  2. Fully thaw your ham and allow it to come to room temperature for 30 minutes. With a sharp knife score a diamond pattern 1/8” deep all over the surface. First slice lines one direction then the opposite.

  3. Stick your whole cloves into the center of each diamond.

  4. Cover with aluminum foil and place in the oven to bake for 1 1/2 hours.

  5. Meanwhile combine the honey, maple syrup, orange juice, mustard, apple cider vinegar, salt and pepper in a saucepan over med-low heat stirring constantly until all the ingredients have combined and are warmed.

  6. Remove the ham from the oven, and brush 1/4 of the glaze over the surface. Return to the oven uncovered and bake for 15 minutes, repeat 3 more times every 15 minutes until you have used all the glaze and your ham has a nice crusty caramelized glossy finish to it.

  7. Remove from the oven and allow to rest 15 minutes before carving.

  8. Enjoy

Recipe adapted from The Pioneer Woman

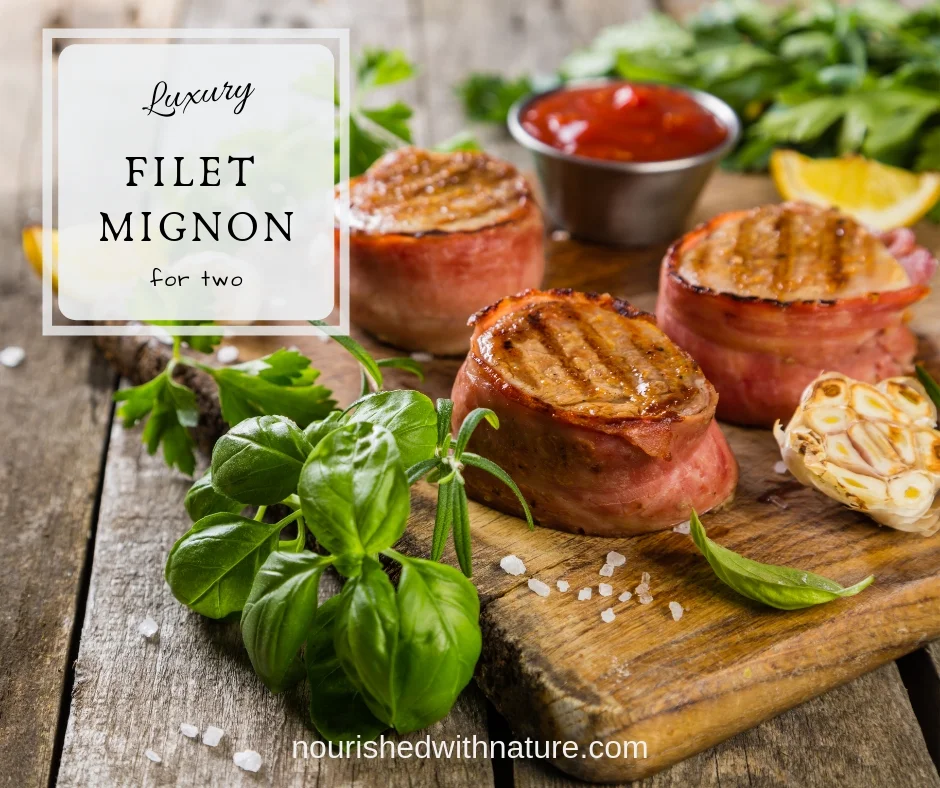
Filet Mignon You Can Fall In Love With

During special occasions like Valentines Day, I look forward to something out of the ordinary, something a little more luxurious and decadent like this filet mignon recipe.

Before I go on, let me just say that filet mignon is the fancy name for beef tenderloin. Same cut.

So, maybe you want to cook your family a nice homemade meal to celebrate the love you have for them.

Maybe you have a spouse that you want to share a romantic candlelight dinner with.

Whatever kind of love you wish to express, this recipe will do the trick.

Homemade meals take some time, but cooking from scratch is worth it.

After all, food is love!

But this is the time you can gather your kids and let them help, tell them stories about how their grandmother made homemade biscuits and pork gravy.

It’s time you can spend growing closer together as a family.

Without a doubt, restaurants are extremely busy this night and honestly, it’s hard to find a restaurants that you trust the quality of their meat.

So just cook at home. Easy peasy.

Swing by our farm store Friday or meet at the Farmer’s Market on Saturday to pick up your filet mignon.

dazle.jpg

Ingredients

  • 2 Nourished With Nature grassfed beef filets at room temperature, patted dry

  • 4 strips Nourished With Nature Forest-raised Berkshire bacon

  • 4 toothpicks to secure bacon

  • 2 Tbsp Garlic Herb Butter 

  • 1 Tbsp Nourished With Nature pork lard or olive oil

  • Coarse sea salt and coarsely ground black pepper to taste.


Directions

  1. Preheat grill or skillet to high heat (the grill works best for this one as it helps to crisp the bacon).

  2. Wrap each filet around the circumference of the disc with 2 pieces of bacon, using toothpicks to secure it the bacon to the outside edge of the beef.

  3. Next, salt and pepper the filets to your liking and place them on the grill or on the skillet with now melted lard. Grill each side 3-5 minutes, depending on steak thickness and desired doneness.

  4. Immediately remove the steaks, dollop a big spoonful of Garlic Herb Butter on each steak and cover, allowing to rest for 10 minutes so the butter melts.

Nice sides include grilled or steamed vegetables, baked or mashed potatoes, fruit salad and Crème Brulee for dessert.

7 Healthy Reasons To Eat Lard

IMG_1515.JPG

Should you be eating lard?

I know what you’re thinking…if I eat lard I’m going to turn into a “tub o’ lard!”

Not true. Even though the word LARD has bad connotations it’s wonderfully healthy.

Whaaaattt???

Before we embraced eating real food we might have believed that eating low fat diets were the way to go.

Our recent generations have shied away from eating lard because it has a bad rap of clogging your arteries, raising your cholesterol and causing heart disease.

Also not true.

Let me share with you 7 Healthy Reasons You Should Be Eating Lard!

  1. Fat is your friend

    Lard is a perfect combination of the three types of fats: monounsaturated fat, saturated and polyunsaturated. Every fat whether it be lard, butter, olive oils or coconut oil are a combination of these three types.

    Fats like olive oil, avocado oil or sesame oil that are liquid at room temperature are mostly unsaturated. Fats like butter and lard which are solid at room temperature are mostly saturated.

    The latest research has concluded that saturated fats aren’t so bad for you after all. Our ancestors didn’t take an ear of corn and squeeze the oil out of it to fry their eggs, they used lard!

    Its a whole food, minimally processed and our bodies know what to do with it!

    Toxins are stored in fat so you need to be careful about where you buy your lard. When pigs are raised the way we do, feeding non-gmo feed, not using antibiotics or hormones and not vaccinating, the fat is clean!

    Your endocrine system, your reproductive system and your brain all need healthy fats to carry signals, balance hormones and function properly.

  2. Lard contains healthy cholesterol

    Cholesterol helps reduce inflammation and produce hormones that relay messages to the pituitary gland and regulate hormones in your body. This can get a bit technical and unless you have a love for science and medicine you may just want to take my word on it.

    In short, one of my sources says “Saturated fats raise HDL (the “good”) cholesterol and change LDL from small, dense (bad) to Large LDL, which is mostly benign. Overall, saturated fats do not harm the blood lipid profile like previously believed.” You can read your heart out here if you like.

  3. Lard is high in Vitamin D

    It has about 1000 IU (international units) per tablespoon depending on what they are fed and how much sunlight the animals get. Our pigs are raised under ideal conditions- in the open air and sunshine, for high doses of vitamin D!

    More Vitamin D means less seasonal mood swings, sounds good to me! I would much rather get my vitamins from my food versus taking a pill.

    Most Vitamin D synthetically made and put in a pill comes from the lanolin in sheep wool. Loosely called “sheep grease”. While I am not opposed to using the whole animal, most of this processing is done overseas in China because it’s cheeper to produce there. That creates a larger carbon footprint, artificially sets the price which is unrealistic to sustain, and gives job to other countries. No bueno.

  4. Lard is heat stable

    It is great for frying your veggies or eggs in because it withstands high heat. It has a smoke point of 370 degrees Fahrenheit. This is good because when foods start to burn they produce free radicals, known cancer causers.

    Oils are best eaten without heating because heat and light destroy them. Have you ever noticed how your olive oil bottles are dark amber colored? And your fish oil supplements say on the bottle to keep them in a cool dark place?

    Make your salad dressings with olive or avocado oil, take your fish oil supplements but leave your cooking, frying and baking to the lard!

    Lard is a fat with a high burning point, so you are less likely to scorch.

  5. Lard is neutral flavored

    You can fry your pasture raised chicken thighs, make pie crusts, cookies and biscuits. Pastries turn out light and flakey when make with lard. It’s so versatile! You can stir fry your vegetables in lard, where as frying in a coconut oil could leave them tasting…well…tropical!

  6. Lard makes you lean

    It’s true. Because when you jump on the eating whole traditional foods bandwagon and you cut out the processed stuff you lose weight.

    I’m not suggesting you sit down to a bowl of lard or that you make deep fried donuts every morning using lard, but I’m talking about a tablespoon a day to fry your pastured eggs or your veggies. Add it to your cornbread instead of vegetable oils and it turns out moist!

    It’s a whole food, when you buy it from us and render it yourself it’s minimally processed and your body knows what to do with it. Eating in moderation is the key.

  7. Lard is local & affordable

    Sustainability starts with eating local. When you eat local you support the economy in your area and you decrease your carbon footprint because your food didn’t have to use all the resources of traveling from across the world. When you purchase a half or whole hog your lard comes free and you can render it yourself.

    Rendering lard is easy. Using the back fat or the leaf lard you just cut it into small pieces and put it in a croc pot. Warm it on low and when it turns to liquid run it through a strainer to take out the little bits of meat that might have been left behind. Pour it into containers and store in the freezer.

    If you are ready to start incorporating this superfood into your diet come visit us in our farm store!

    Let us be your source for clean lard!

    Leave a comment below with your favorite way to cook with lard. If you never have what’s the first way you’re going to try cooking with lard?

IMG_1517.JPG

Santa's Favorite Chocolate Chippers

Santa’s.png

A homemade chocolate chip cookie recipe that Santa will love!

This recipe includes Einkorn Flour, Coconut Sugar, Pastured Pork Lard and Pastured Eggs.

You can pick up the lard and eggs in our FARM STORE!

It’s delicious and good for you too!

Check out my blog 7 Healthy Reasons to eat Pastured Pork Lard if you are new to this superfood.

Amidst all the holiday food, I begin to feel like I’m headed down a slippery slope. I find myself eating crap because I’m at a party or because someone made is special for me and delivered it to my house.

My gut ends up unhappy, my moods are like a roller coaster, and it just leaves me craving MORE SUGAR!

Can you relate?

Why not help your kids help Santa too?


IMG_1140.jpg

Ingredients:

IMG_1139.JPG
  • 1/3 cup Nourished With Nature Pastured Pork Lard

  • 1 cup Organic Coconut Sugar

  • 1 cup Organic Cane Sugar

  • 2 Nourished With Nature Pastured Eggs

  • 2 tsp. vanilla

  • 3 cups Young Living’s Einkorn Flour

  • 1 tsp. salt

  • 1 1/2 cups Organic Chocolate Chips

  • 1 cup nuts (optional)

Directions:

  1. Combine lard, sugars, eggs and vanilla. Mix well. Blend in remaining ingredients.

  2. Drop by teaspoonfuls onto baking sheet.

  3. Bake at 375 degrees for 8-10 minutes.

  4. Enjoy! I mean tell Santa to ENJOY!

Swing by our FARM STORE to stock up on Pastured Pork Lard and Eggs!

IMG_1075.JPG