Homemade Honey Vanilla Ice Cream

F87F7BF2-2AE8-4F19-85F5-7F54D233878C.jpg

When it’s summertime and it’s hot outside, everyone loves this thick creamy custard base ice cream with vanilla bean flecks throughout!

  • Birthday parties

  • Sunday Dinners

  • Just because…

This recipe uses quality ingredients, full of good fats highly revered by the Weston A. Price group!

Healthy whole fats like grass fed milk and cream, the good cholesterol in pastured eggs and the honey used to sweeten are all nutrient dense foods and you won’t feel guilty about having seconds!

High fat diets are super important for fertility as well as brain development in fetus and babies. Good cholesterol from the eggs helps keep hormones happy and regular for ALL ages.

If you are dairy free you are welcome to substitute the milk and cream for organic coconut or almond milk, just use the boxed kind, not aluminum cans.

Here is what you’ll need:


Ingredients:

  • 9 Nourished With Nature Egg Yolks (only 6 if using large eggs)

  • 1 cup whole raw milk (goats milk, coconut or almond milk is okay to substitute too)

  • 2 cups heavy cream (divided)

  • 3/4 cup honey

  • pinch of salt

  • 1 vanilla bean

  • 3/4 tsp vanilla extract


Instructions:

  1. Combine the milk, honey, 1 cup of the cream and salt in a medium saucepan.

  2. Cut the vanilla bean in half lengthwise and scrape the beans out of the center into the milk mixture. Add the pod too, we’ll take it out later.

  3. Cook over medium heat, stirring occasionally until warmed throughout. Do not boil.

  4. Remove from heat, cover the pan and let steep for 30 minutes.

  5. In a medium bowl whisk the egg yolks together.

  6. Slowly pour the warm milk mixture into the egg yolks, whisking as you go.

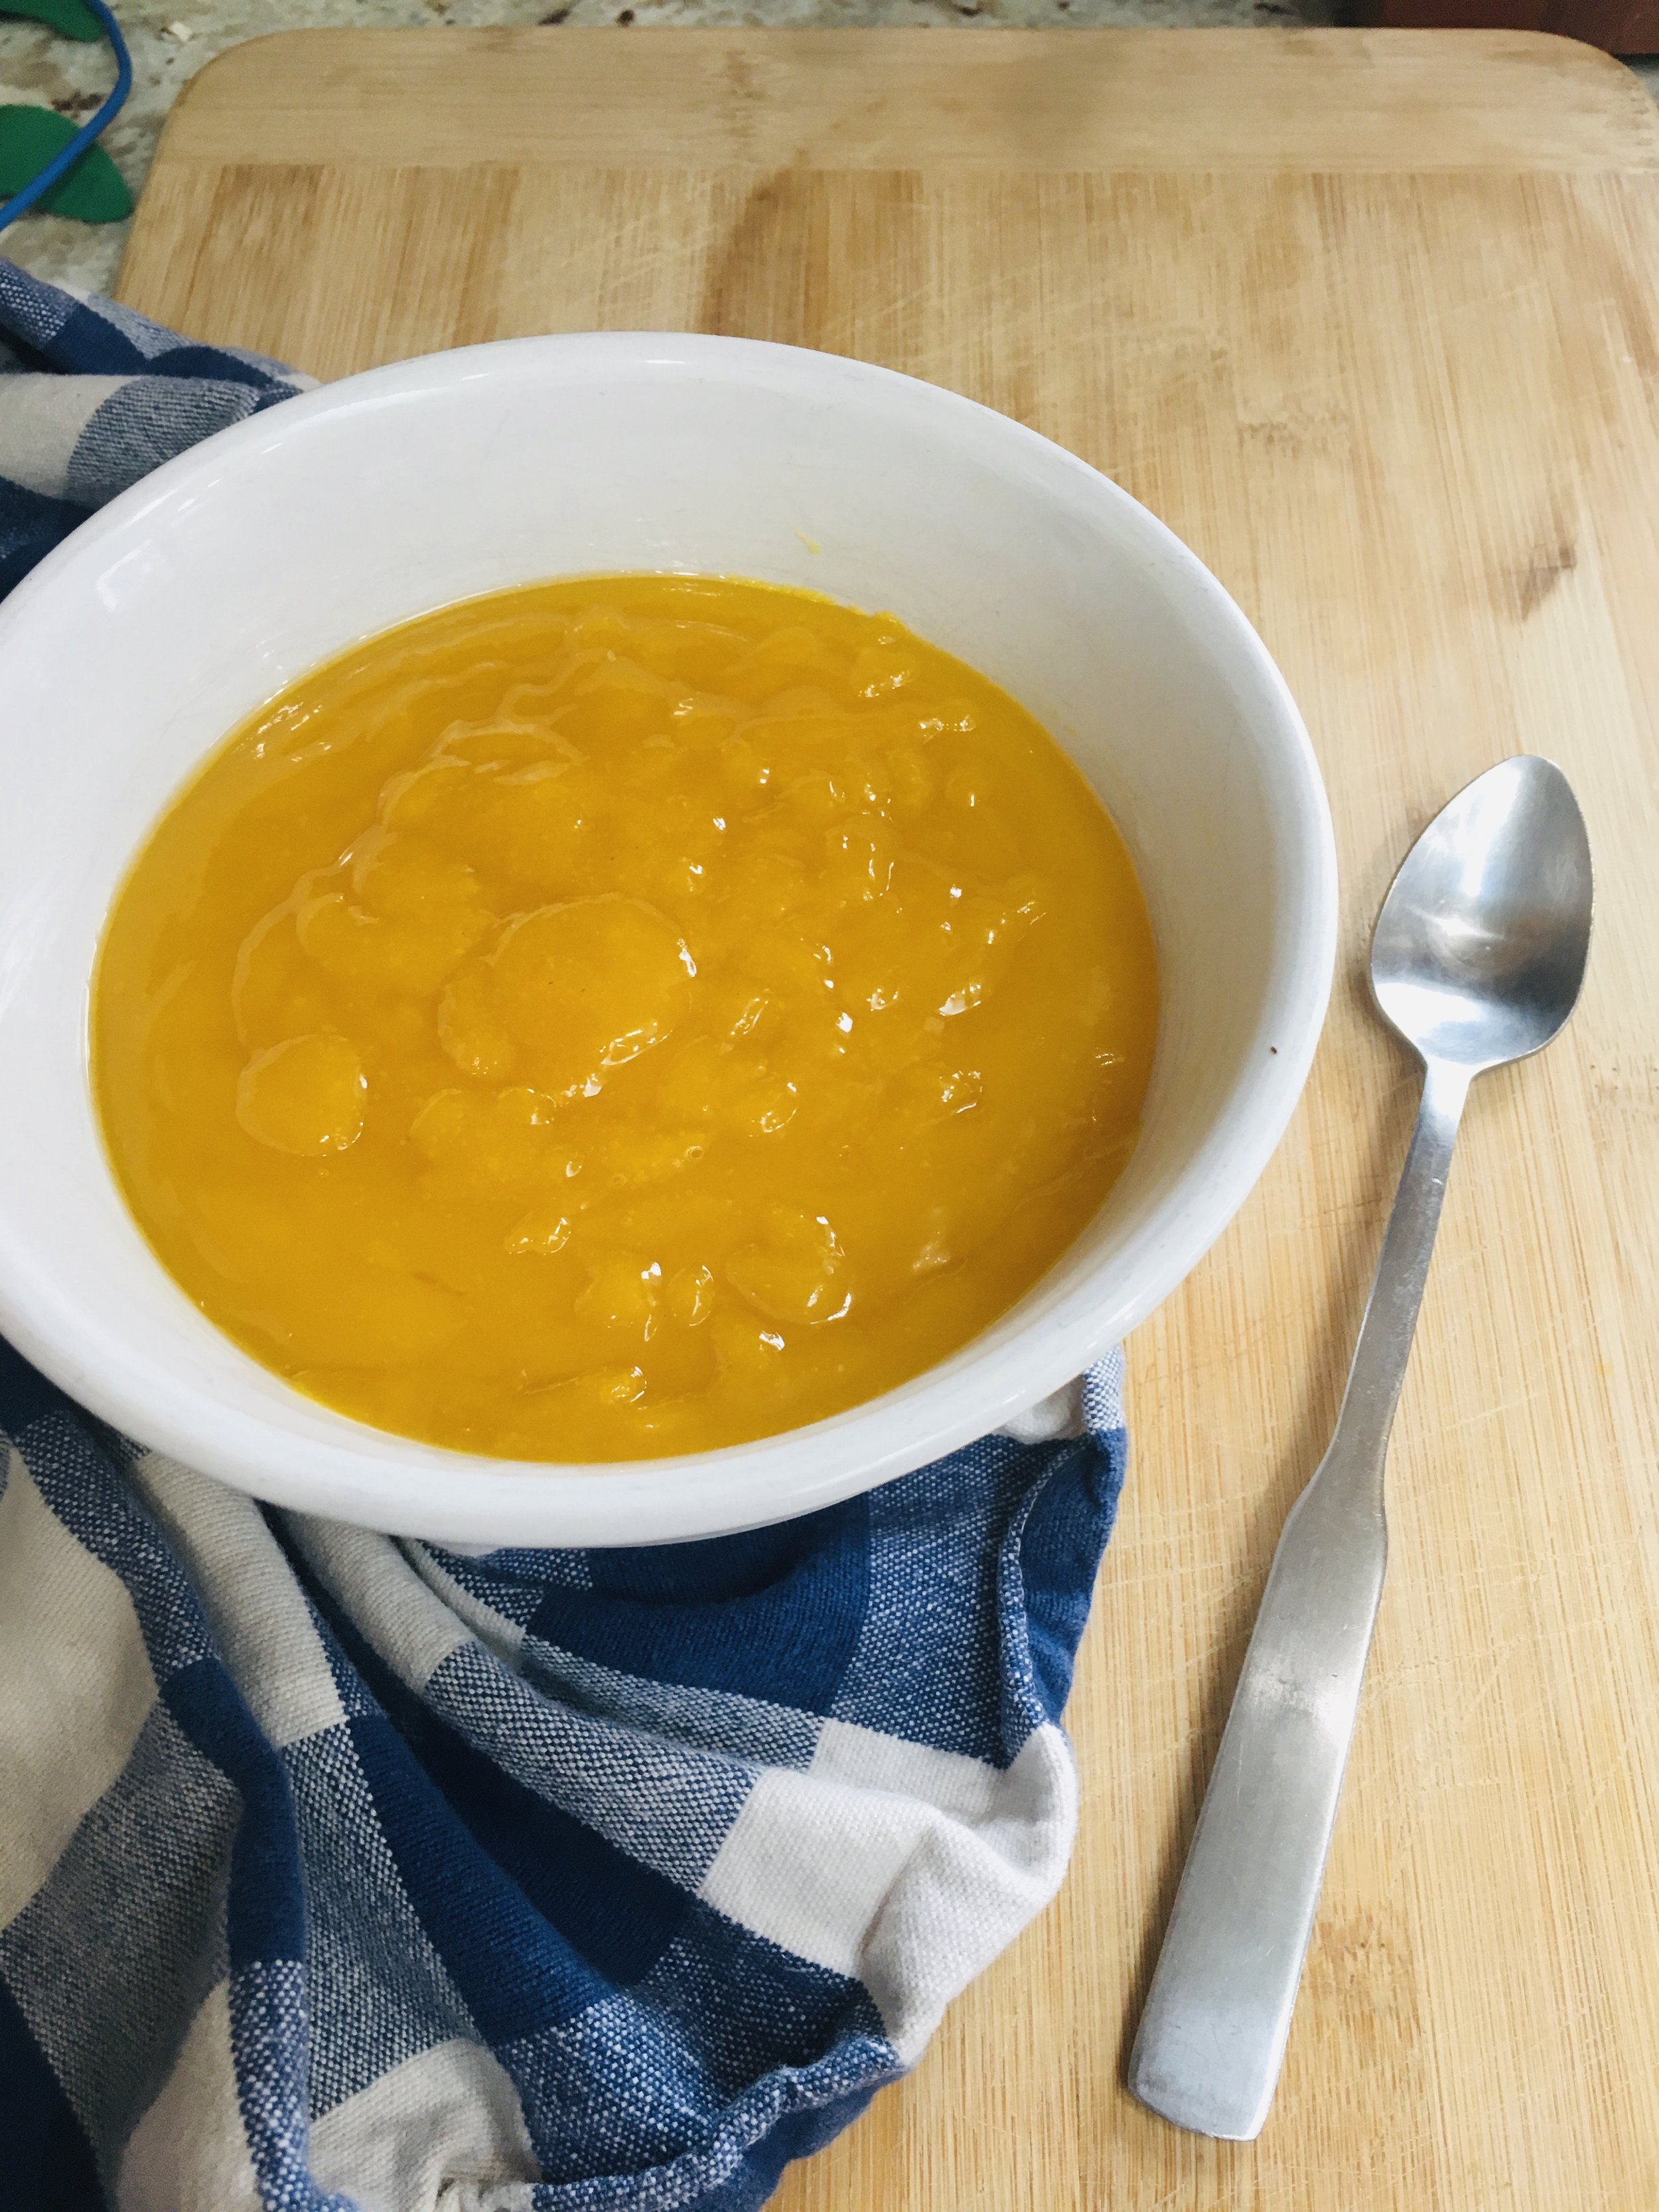
  7. Pour eggs and milk mixture back into the saucepan and cook over medium heat. Using a spatula stir continuously until the mixture thickens and coats the back of a spoon.

  8. Pour through a fine mesh sieve to remove any scrambled bits of egg. Add the remaining 1 cup of cream. Stir in the vanilla extract.

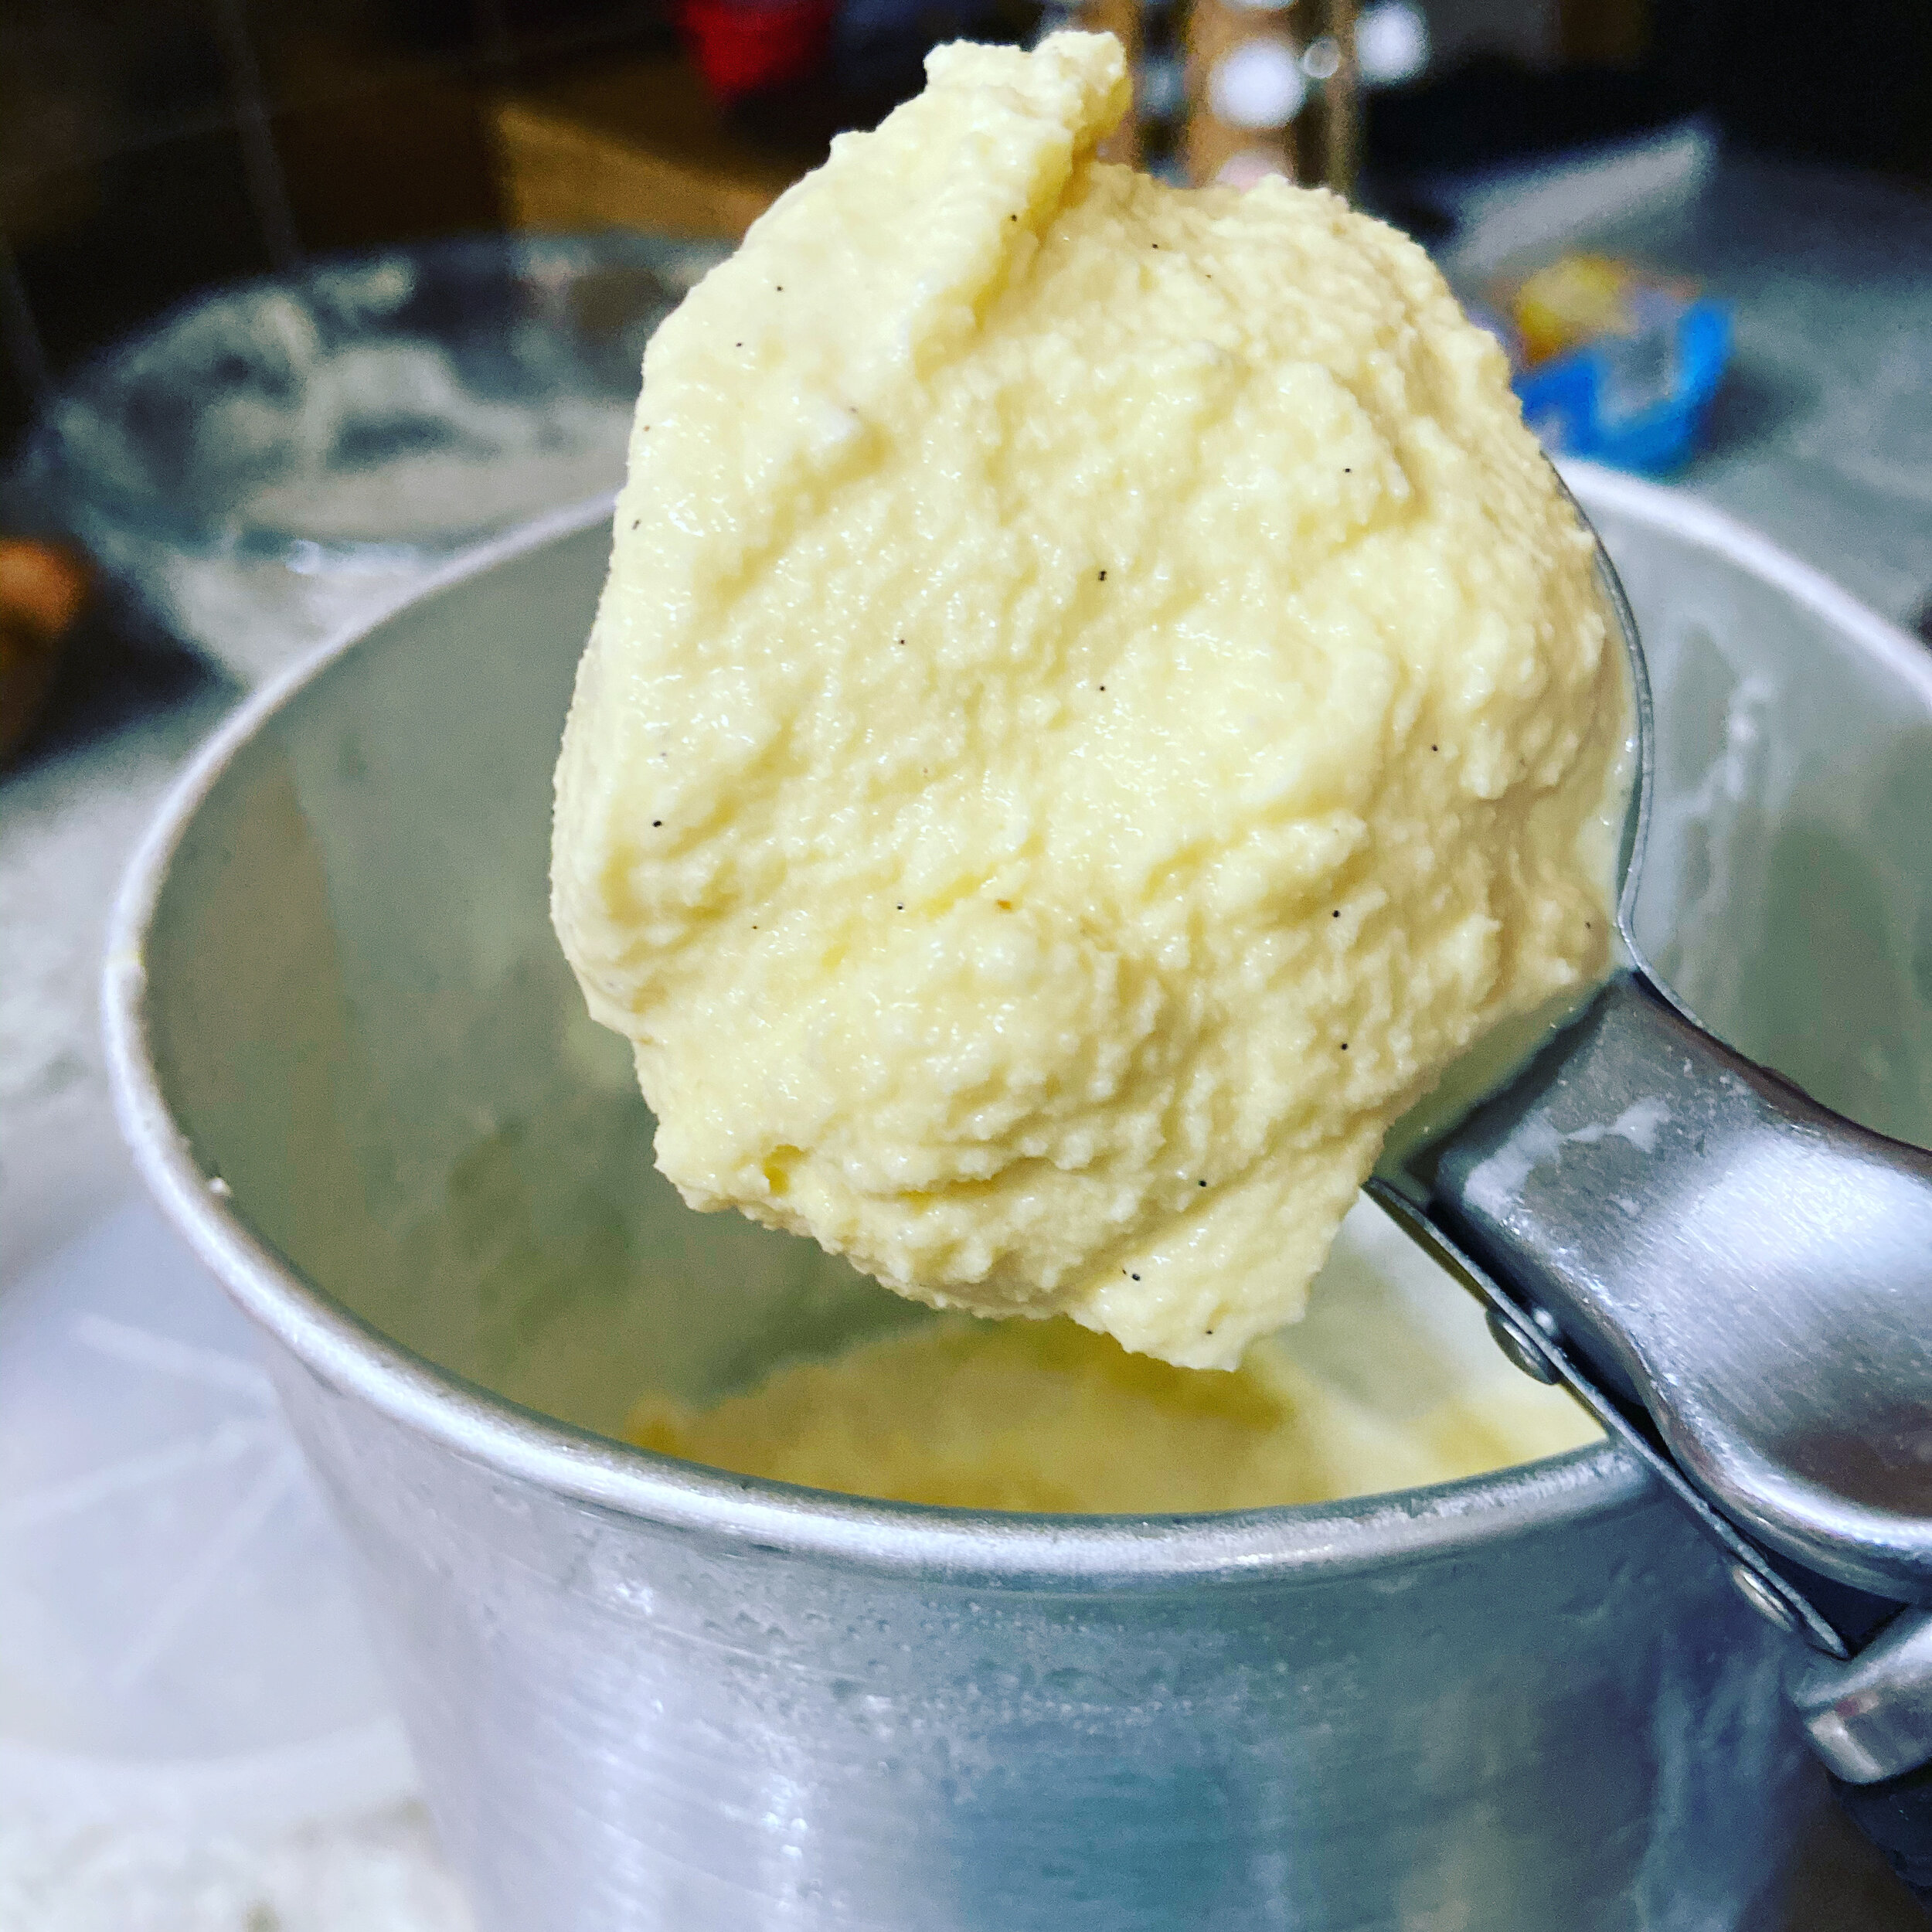
  9. Place in an ice bath and stir frequently until cooled.

  10. Cover and refrigerate until fully chilled, preferably overnight. The longer this chills the more creamy it will be! The vanilla bean can remain in the custard mixture until right before you churn.

  11. Using an ice cream churn, freeze the custard according to the manufacture’s instructions. Lots of ice cream salt is the key, and I always have to finish firming mine up in the freezer if I want totally frozen ice cream.

  12. Enjoy!

Tell me in the comments how it turned out!

Luscious Lemon Curd

Lemon Curd is a seasonal treat, straight from the farm.

It signals springtime and helps us use what is abundant- pastured eggs!

This simple, sunshiney recipe uses just four wholesome ingredients: fresh lemons, local honey, grass-fed butter, and our own pastured-raised eggs.

It’s rich, tangy, and bursting with nutrition.

So here is how to make it:

INGREDIENTS:

  • 5 Nourished With Nature Egg Yolks

  • 1/2 cup local raw honey

  • 1/2 cup fresh squeezed lemon juice

  • Lemon zest from fruit

  • 1/2 cup Butter (I like KerryGold)

  • 10 drops Lemon Essential Oil (optional)

INSTRUCTIONS:

  1. Whisk egg yolks, honey, juice and zest in the top of a double boiler pan over simmering water. Any pan or bowl will work, as long as it can be nestled over another pan of boiling water.

  2. Stir with a rubber spatula 6-9 minutes over the pan of barely boiling water. The egg yolks can be quick to scramble so you want to keep stirring and keep the heat medium to low. Stir until it reaches the thickness of yogurt, it might take closer to 12 minutes. You’ll know it’s done when the curd coats the sides of your pan and spatula.

  3. Remove the pan from over the boiling water and stir in the butter. Once the butter is melted run the curd through a fine mesh sieve to remove the zest and scrambled bits.

  4. Stir in lemon essential oil if you want an extra tangy pop of flavor. The essential oil is cold pressed from the rind of lemons so it can be substituted for the zest or, if you’re like me and NEVER get enough lemon, add it in additionally! Do this in the cooling stage as heating this essential oil will void it of it’s nutritional value. It’s also important that you trust the source of your essential oil, as NOT ALL are safe for internal use. Young Living’s ARE. They are labeled “Vitality” when they are generally regarded as safe for ingestion. Email me if you would like to get 25% off essential oils.

  5. Pour into a jar and refrigerate. Curd will thicken as it cools. This can be frozen or kept fresh in the fridge for 10-14 days.

Enjoy!

IMG_6313.JPG

Healthy Homemade Marshmallows

It’s summertime!

And with warmer weather and longer nights approaching, everyone loves a good bonfire cookout!

Marshmallows are a staple in summertime smores but what if you are trying to avoid SUPER processed junk foods, high fructose corn syrup, white sugar and other icky synthetic ingredients?

Here’s a recipe for you to try that uses SIMPLE healthy ingredients to make your own marshmallows at HOME!

Eating healthy can still hold all the American traditions and be fun!

Pretty aren’t they?!

Pretty aren’t they?!

Ingredients:

  • Butter, Coconut Oil or NWN Pastured Pork Lard

  • 3 Tablespoons Grass-Fed Beef unflavored gelatin powder

  • 1 Cup water, separated

  • 1 Cup honey

  • 1 tsp Vanilla extract

  • About 1/4 cup arrowroot powder for dusting

Instructions:

  1. Use your butter, coconut oil or lard to grease a 9 x 13” baking pan. You need very little grease and you can also use parchment paper if you have it. Set this pan aside for later.

  2. Place gelatin powder and 1/2 cup of water into a large mixing bowl and whisk to combine then set aside. I used my Kitchen Aid mixer.

  3. Place 1/2 cup water and 1 cup honey into a small saucepan and slowly bring to a boil. Stir constantly until a candy thermometer reads 240 F.

  4. Quickly and carefully pour honey mixture into mixing bowl with the beef gelatin and beat on high for 6-10 minutes. Beat until fluffy and mixture begins to change into a stiff cream. Soft peaks will begin to form.

  5. Around 6 minutes add in the vanilla extract.

  6. Once it forms a stiff cream you’ll need to work fast! Pour cream into prepared pan and let sit, uncovered, at room temp for 4 hours.

  7. Remove from pan and using a pizza cutter, sharp knife or even cookie cutters cut into desired shapes. Dust each marshmallow in arrowroot powder (this is a corn starch alternative) so that they don’t stick to each other, and store in a bowl or open container 3-5 days. Do not cover or store in the fridge as moisture will dissolve them.

  8. Enjoy your easy homemade marshmallows!

    Recipe adapted from The Healthy Toast

Honey, Grass-Fed Beef Geletin & Vanilla

Honey, Grass-Fed Beef Geletin & Vanilla

Pastured Pork Lard

Pastured Pork Lard

Whip these up in the Kitchen Aide then let the kids lick the beater!

Whip these up in the Kitchen Aide then let the kids lick the beater!

Pout into 9 x 13” baking pan and smooth the top with a rubber spatula.

Pout into 9 x 13” baking pan and smooth the top with a rubber spatula.

Cut into squares and dust with arrowroot powder.

Cut into squares and dust with arrowroot powder.

Make a homemade graham cracker, add dark chocolate and a marshmallow for Smores!

Make a homemade graham cracker, add dark chocolate and a marshmallow for Smores!

Pro Tips:

  1. CONSTANTLY stir the honey and water mixture on your stove top so that you don’t end up with an overflowing bubbly sticky mess. Don’t step away to start the dishes, just keep stirring.

  2. When you get to the whipping step, whip only until it looks like marshmallow cream otherwise it will start to form into dense marshmallows in your mixing bowl.

  3. For smooth and fluffy marshmallows pour the cream as fast as you can into the prepared 9 x 13 pan, as it will quickly start to firm up.

  4. Avoid any MOISTURE when storing these. That means no fridge and no lids. You can cover with a clean dish cloth or partially cover with a lid and leave on the counter.

  5. And lastly I would recommend melting the chocolate on the graham cracker then adding the marshmallow. These types of mellows do not behave like store bought, they melt when you put them in fire. My strong advice is to warm them gently over an indirect flame or eat them cold. They also make a great topping to hot chocolate!

Rotisserie Style Whole Chicken in the Instant Pot!

Photo Credit: Lemon Blossoms Blog

Photo Credit: Lemon Blossoms Blog

This Whole Rotisserie Style Chicken is one of my favorite quick and easy weeknight meals. The meat comes out juicy, tender and flavorful every time!

It’s so simple too! Anyone can do it!

It can be cooked fresh or frozen, giving me no excuses for a healthy homemade meal. Lets be honest, sometimes I don’t plan ahead enough to grab something out of the freezer to thaw for dinner that night. Problem solved!

So here is what you need to make this Rotisserie Style Whole Chicken!

IMG_7630.JPG

Ingredients:

  • 1 (4-5 pound) Nourished With Nature whole chicken

  • 3 Tbsp olive oil

  • 1 Tbsp paprika

  • 2 tsp garlic powder

  • 1 tsp onion powder

  • 1 tsp dried thyme

  • 1/2 tsp dried oregano

  • 2 tsp salt

  • 1/4 tsp ground black pepper

  • 1 cup chicken broth

Instructions:

  1. Combine your spices in a small bowl: paprika, garlic powder, onion powder, thyme, oregano, salt, pepper

  2. Loosen the skin on the chicken by gently lifting and pulling it off the meat. Rub 1 Tbsp olive oil and about 1/3 of the spice mix under the skin and massage with your fingers to spread evenly. Next rub another 1 Tbsp olive oil and the rest of the spice mix over the outside of the chicken. If your chicken is frozen try soaking it in a big bowl of hot water, changing out the water a couple times when it cools down. This will thaw your bird enough to loosen the skin at least.

  3. Turn on your Instant Pot to Saute mode and add the last 1 Tbsp Olive Oil to the bottom. When it’s sizzling hot drop the chicken in breast side down and brown it for a couple minutes. This step is optional if you don’t want to take the time or if your bird is frozen.

  4. Turn off the Instant Pot, remove the chicken and place on the trivet wire rack that came with your machine, breast side up.

  5. Add the chicken broth to the bottom and deglaze the crispy bits that are stuck on with a wooden spoon.

  6. Lower the trivet back down into the Instant Pot and close the lid, set valve to “seal”

  7. Cook on high pressure using the time tables below.

  8. When done, let the pressure release naturally for 15 minutes, then do a quick release to get rid of any remaining pressure.

  9. Open the lid and remove the chicken.

  10. For extra crispy skin, you can broil the chicken in the oven for 4 to 5 minutes.

 
IMG_7635.JPG
IMG_7637.JPG
IMG_7638.JPG

Having a Whole Rotisserie Chicken cooked is convenient for whipping up Chicken Enchiladas, White Chicken Chili, Chicken Tortilla Soup or Chicken Tacos. The diced meat is even great on a Southwestern Salad. The juices left in the pot after cooking make the BEST homemade Enchilada Sauce too!

You don’t have to stretch it out though, you could have a breast and thigh along with a side of baked sweet potatoes and a creamy coleslaw. Mmmmmm…..

Photo Credit: Lemon Blossoms Blog

Photo Credit: Lemon Blossoms Blog

***It’s also worth mentioning that this can be cooked in the oven if you haven’t yet entered into the world of the incredible Instant Pot***

Cooking Times for Instant Pot Whole Chicken

Thawed or Fresh Chicken

  • A 3 – pound chicken will need 18 minutes of High Pressure Cooking Time with a 15 minutes Natural Pressure Release.

  • A 3.5 – pound chicken will need 22 minutes of High Pressure Cooking Time with a 15 minutes Natural Pressure Release.

  • A 4 – pound chicken will need 24 minutes of High Pressure Cooking Time with a 15 minutes Natural Pressure Release.

  • A 4.5 pound chicken will need 27 minutes of High Pressure Cooking Time with a 15 minutes Natural Pressure Release.

  • A 5 pound chicken will need 32 minutes of High Pressure Cooking Time with a 15 minutes Natural Pressure Release.

Frozen Chicken

  • A 3 – pound chicken will need 39 minutes of High Pressure Cooking Time with a 15 minutes Natural Pressure Release.

  • A 3.5 – pound chicken will need 46 minutes of High Pressure Cooking Time with a 15 minutes Natural Pressure Release.

  • A 4 – pound chicken will need 52 minutes of High Pressure Cooking Time with a 15 minutes Natural Pressure Release.

  • A 4.5 pound chicken will need 59 minutes of High Pressure Cooking Time with a 15 minutes Natural Pressure Release.

  • A 5 pound chicken will need 65 minutes of High Pressure Cooking Time with a 15 minutes Natural Pressure Release.

This recipe was adopted from Lemon Blossoms Chef Kathy

Tasty Chicken Tortilla Soup

This recipe is so tasty and quick for those nights when you don’t want to dirty a million pots!

Nourishing, filling and warming, perfect for a homemade dinner around the table with your family!

Ingredients:

  • 4 Nourished With Nature Chicken Breasts

  • 6 cups Chicken Broth

  • 2 cups salsa

  • 1 quart stewed diced tomatoes

  • 2 tsp cumin

  • 2 cups organic corn

  • 1 cup fresh cilantro chopped

  • Diced avocado, lime wedges and grated cheddar cheese to garnish

Instructions:

  1. Salt and pepper whole chicken breasts and cook in a large cast iron style pot. I love my knock off LaCruset pot for this soup!

  2. Shred the chicken, then in the same pot add your chicken broth, salsa, cumin, corn, stewed tomatoes and simmer for 20-30 minutes.

  3. Serve with organic corn chips, garnish with shredded cheese, avocado slices, lime wedges and cilantro.

  4. Enjoy!

IMG_6646.JPG
IMG_6647.JPG