
If you’re like me, homemade pies are one of my favorite things!
I am a crust lover.
I am a firm believer that your crust either makes your pie a huge SUCCESS or makes it just so-so.
Soggy crusts are not okay, bland crusts are yukky, it’s no wonder some people aren’t a fan!
This crust is crumbly, melt in your mouth and slightly sweet.
You can use this crust for a pumpkin pie, apple pie or even a chicken pot pie.
There are about as many homemade pie crust recipes out there as there are pairs of shoes, so I’ve done the hard work for you in finding the perfect one.
There is no kneading or flouring your surface for this recipe.
You won’t have to worry about the dough tearing, because it can just be pressed back together.
This could be a “pat in the pan” recipe, no rolling pin needed.
So if you get frustrated with the shape, just start slapping it into your pie dish and press it to the sides with your fingers.
But, if you follow my instructions below, you just simply mix, roll and bake.
And if you hear the word “lard” and tend to shy away because you think it’s not healthy I challenge you to think again. Healthy fats DO NOT MAKE YOU FAT!
To brush up on 7 Healthy Reasons to Eat Lard check out this blog post.
This lard is from our very own pigs raised in our oak forest and finished on acorns.
So come by our farm store this week or catch us at the Corvallis Farmers Market on Saturday and pickup some lard for this recipe!
Here we go:
This makes a double recipe for two pumpkin pies or one covered pie.
Ingredients:

1 1/2 cup Nourished With Nature Pastured Pork Lard (room temp)
1/2 cup boiling water
2 Tbsp milk
4 Tbsp sugar (optional)
1/2 Tbsp salt
4 cups flour
Instructions:
Put lard, milk and sugar into a mixing bowl with whisk attachment (KitchenAids work great)!
Pour in boiling water.
Whisk on medium speed until all water is mixed into the lard, 2-3 minutes.
Switch to your dough hook or paddle attachment.
Sift salt and flour together and add to the lard mixture, stir until blended.
Divide dough into two pieces.
Place dough in-between two large pieces of wax paper and using a rolling pin, roll out to the size pie crust you need. Make it about two inches larger than your pie plate so you have enough crust to come up the sides.
The dough will be quite soft and sticky, which means you’re not going to be able to lift or maneuver it much with your bare hands. Remove the top piece of wax paper and flip your pie crust into your pan using the bottom piece. Then peel off the wax paper. You can press or shimmy your crust into the corners. It’s very forgiving if it tears you can just press it back together.
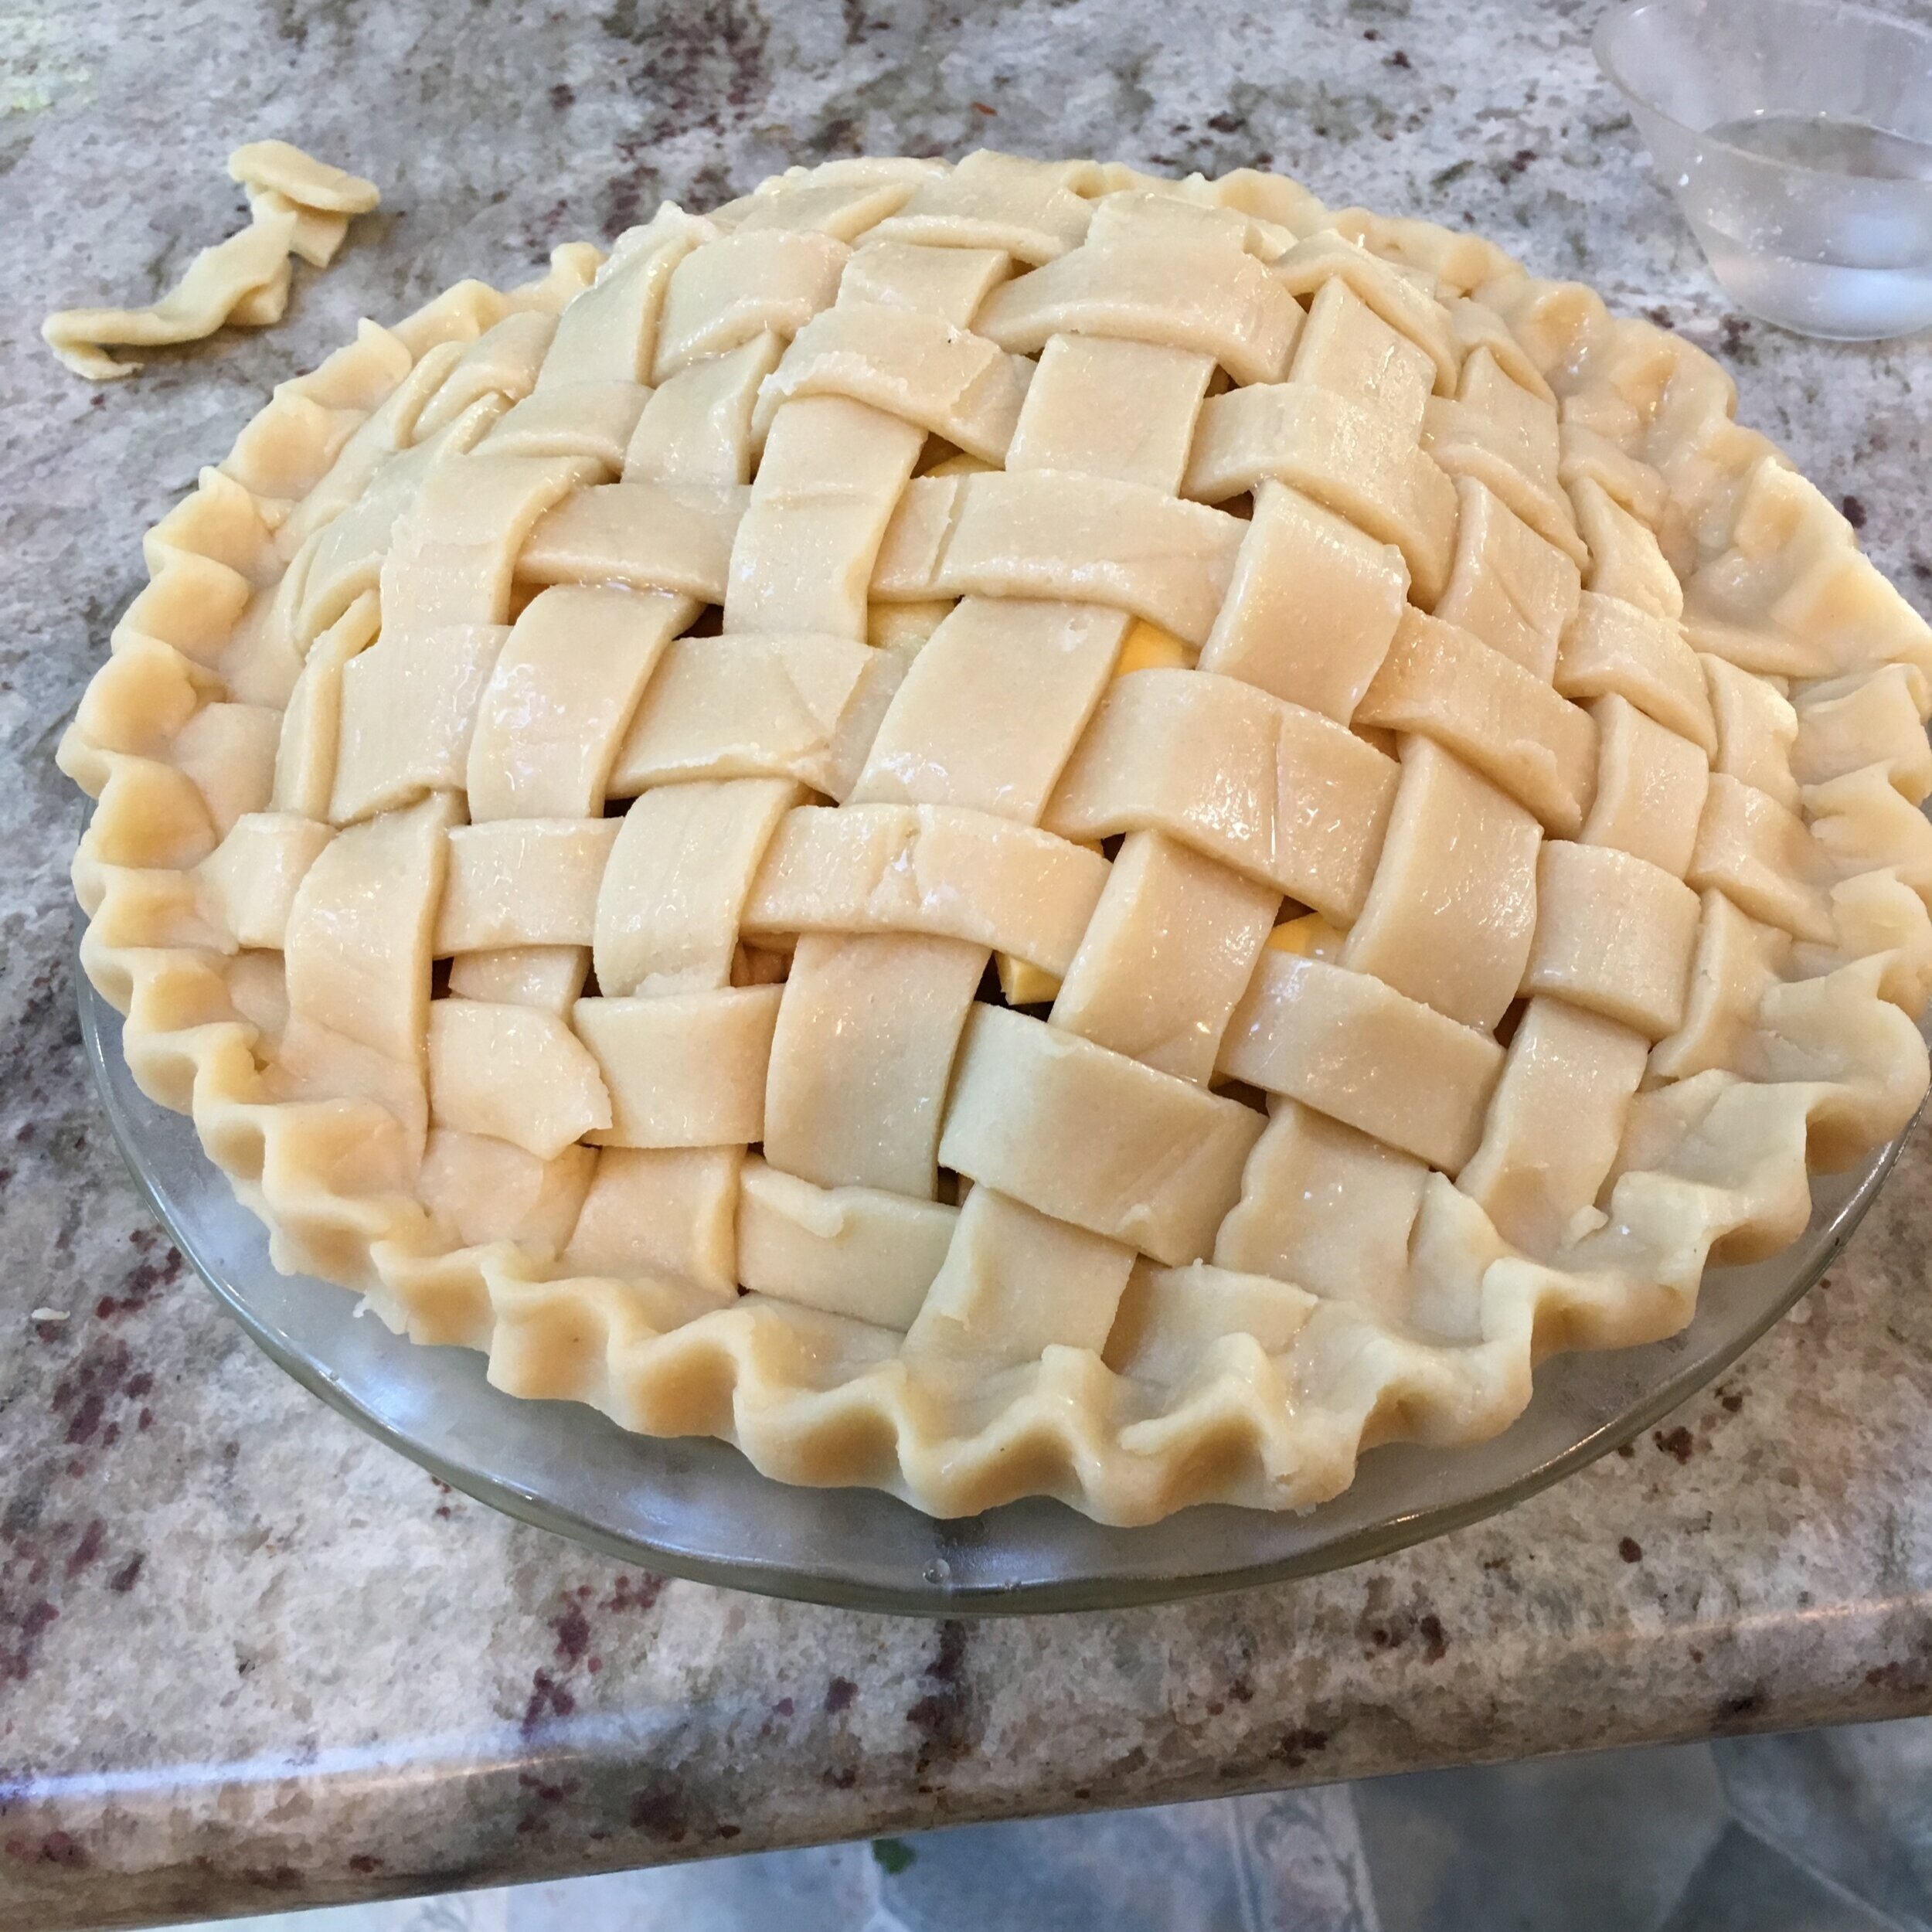
Repeat rolling out the dough with your second half if you are making a covered pie such as an apple or berry. This time slide the dough, still in between the wax papers, onto a cookie sheet and refrigerate for 20-30 minutes until firm. A little firmer dough will allow you to cut strips for a lattice top or use cookie cutters with leaf designs if you’re feeling super fancy.
If making a covered pie trim off any excess dough and pinch the top and bottom together. I use my index and thumb fingers of one hand and my index finger of the other to press the dough between to make the wavy edge. You could even just use a fork and press a design into the edges, sealing the top and bottom together.

Lattice top pies do not need to vent, the juices will bubble up through each little slit.
Completely covered pies, like this marionberry pie, need to vent. I just happen to have this cute little birdie, given to me by my mom whos cousin gave it to her before I was born, made just for the occasion!
You can also just cut 4-5 slits in a circular design to allow for venting.

Pro Tips for Baking
If you are making a custard type pie with a liquid filling such as lemon meringue, pecan or pumpkin pie, prebaking the bottom crust is recommended so that your crust is not soggy.
Line the bottom crust with parchment paper, flaring it over the crust edge like an awning, to keep from overbrowning. Fill with dry beans or rice to the very top or bank the beans against the sides if you don’t have enough to fill to the brim. This will prevent shrinkage and help the crust keep it’s shape when baking.
Bake for 20 min at 400F with the weights in place. Carefully lift the weight out and prick the pastry with a fork all over, then return to the oven to finish baking 5-10 minutes or until golden brown.
Check the pastry periodically and if it puffs up, prick with a fork and gently press down with the back of a spoon.
If you are filling the crust with an uncooked mixture that requires further baking whisk together:
1 Egg Yolk
1 Tbsp water
pinch of salt
Brush this mixture all over the inside of the crust and return to the oven until the egg glaze sets 1-2 min. Fill the shell when it’s still hot or let it cool as the recipe specifies.
The time you spend on making a homemade pie crust will be SOOOOOOOOO WORTH IT!
It’ll taste delicious, you will know the ingredients you used and you’ll feel proud to lay it on the table at your next holiday gathering!
Swing by our farm store this week or catch us at the Corvallis Farmers Market on Saturday and pickup some Lard so you can make these Never Fail Pie Crusts for the holidays.
Source -Joy of Cooking by Irma S. Rombauer, Marion Rombauer Becker and Ethan Becker